← Back to Course
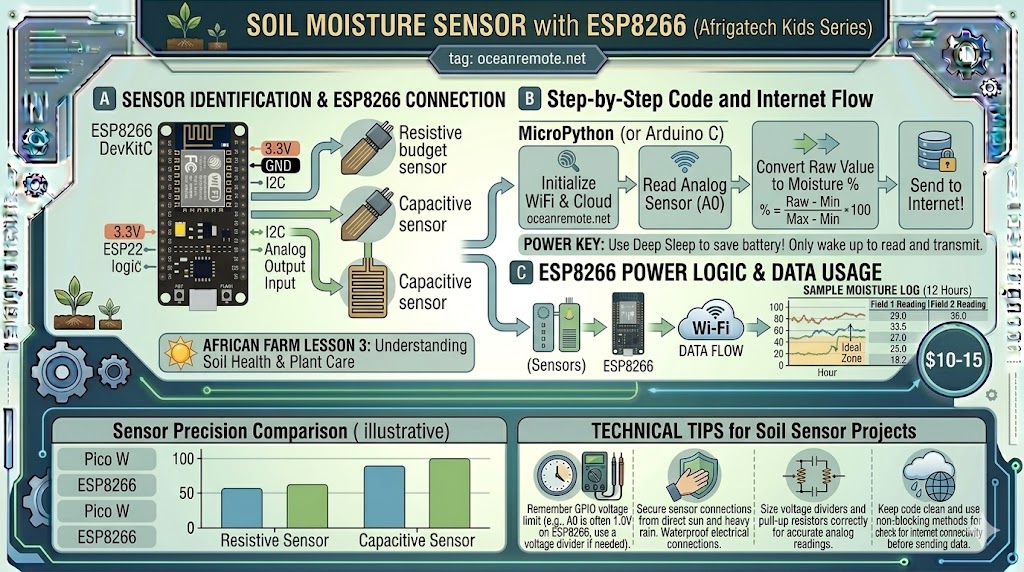
Soil Moisture Sensor with ESP8266
💧 Soil Moisture Sensor Complete Guide for ESP8266
💧 What You'll Learn:
- 🔌 Wire soil moisture sensor with voltage divider for ESP8266
- 📊 Calibrate sensor for accurate moisture readings
- 💧 Make irrigation decisions based on soil conditions
- ⚠️ Understand why ESP8266 needs voltage divider (0-1V max!)
⚠️ IMPORTANT: ESP8266's only analog pin (A0) accepts 0-1.0V only! Most soil moisture sensors output 0-3.3V, so you MUST use a voltage divider to avoid damaging your board.
🔌 Wiring with Voltage Divider
═══════════════════════════════════════════════════════════════════════════════
                    VOLTAGE DIVIDER WIRING FOR ESP8266
═══════════════════════════════════════════════════════════════════════════════

    Capacitive Sensor                    ESP8266 (NodeMCU)
    ┌─────────────────┐                  ┌─────────────────┐
    │ VCC (3.3-5V)    │ ───────────────► │ 3.3V (or VIN)   │
    │ GND             │ ───────────────► │ GND             │
    │ AO (Analog Out) │ ──┬─────────────► │ A0              │
    └─────────────────┘   │              └─────────────────┘
                          │
                    ┌─────┴─────┐
                    │ 10kΩ      │
                    │ resistor  │
                    └─────┬─────┘
                          │
                         GND

    Formula: Vout = Vin × (R2 / (R1 + R2))
    With 10kΩ to GND, 3.3V input → ~3.3V × (10k/3.3k) - NOT correct!

    CORRECT DIVIDER (3.3V → 1.0V):
    Sensor AO ──┬── 10kΩ resistor ──► A0
               │
               └── 3.3kΩ resistor ──► GND

    This divides 3.3V down to ~1.0V (safe for ESP8266)

═══════════════════════════════════════════════════════════════════════════════
📖 Complete Code
#define SOIL_PIN A0

// ========== CALIBRATION VALUES ==========
// CALIBRATE THESE FOR YOUR SPECIFIC SENSOR!
const int DRY_VALUE = 950;   // Value in dry air (calibrate this!)
const int WET_VALUE = 350;   // Value in water (calibrate this!)

void setup() {
    Serial.begin(115200);
    Serial.println("Soil Moisture Monitor Started");
    Serial.printf("Calibration: Dry=%d, Wet=%d\n\n", DRY_VALUE, WET_VALUE);
}

void loop() {
    int raw = analogRead(SOIL_PIN);
    int moisture = map(raw, DRY_VALUE, WET_VALUE, 0, 100);
    moisture = constrain(moisture, 0, 100);

    Serial.println("━━━━━━━━━━━━━━━━━━━━━━━━━━━━━━━━━━");
    Serial.printf("📊 Raw ADC: %d\n", raw);
    Serial.printf("💧 Soil Moisture: %d%%\n", moisture);

    if (moisture < 30) {
        Serial.println("⚠️ CRITICAL: SOIL IS DRY - Water immediately!");
    } else if (moisture < 45) {
        Serial.println("💡 Soil drying - Plan irrigation soon");
    } else if (moisture <= 70) {
        Serial.println("✅ OPTIMAL - Soil moisture adequate");
    } else if (moisture <= 85) {
        Serial.println("💧 Soil moist - Reduce irrigation");
    } else {
        Serial.println("⚠️ Soil too wet - Risk of root rot!");
    }
    Serial.println("━━━━━━━━━━━━━━━━━━━━━━━━━━━━━━━━━━\n");

    delay(60000);  // Read every minute
}
💡 Calibration Tips:
- DRY_VALUE: Place sensor in dry air for 2 minutes, record the reading (typically 800-1000)
- WET_VALUE: Submerge sensor completely in water for 2 minutes, record the reading (typically 200-400)
- Every sensor is different - Always calibrate YOUR sensor!
- Clay soil holds more water than sandy soil - adjust irrigation thresholds accordingly
⚠️ Common Issues:
- ❌ No voltage divider: Will damage ESP8266 A0 pin (max 1.0V!)
- ❌ Reading always 0% or 100%: Wrong calibration values - re-calibrate
- ❌ Reading decreases over time: You're using a resistive sensor (replace with capacitive)
- ❌ Values stuck at 1024: A0 pin not connected or floating
🎉 Key Takeaways:
- ✅ ESP8266 A0 = ONLY 0-1.0V (use voltage divider!)
- ✅ Voltage divider: 10kΩ + 3.3kΩ (3.3V → 1.0V)
- ✅ Always calibrate: dry air + water test
- ✅ Capacitive sensors last YEARS (resistive fails in months)
- ✅ Read every 15-60 minutes - not constantly
💡 Key Takeaways:
- Apply these concepts directly to your farm or project.
- Take notes on important details for the quiz.
- Use the button below to track your progress.
×
![Enlarged view]()