← Back to Course
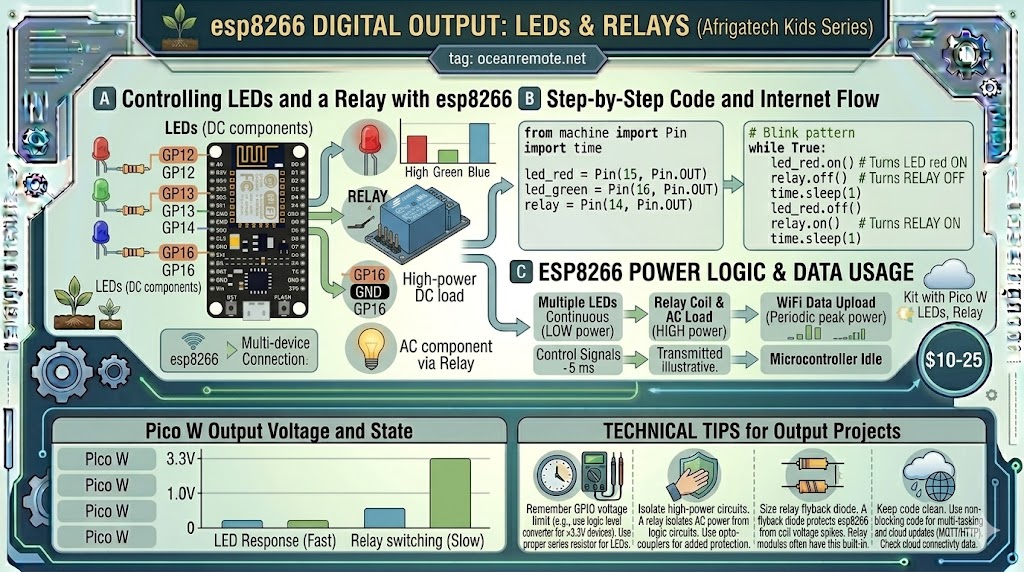
Digital Output: LEDs and Relays
💡 Digital Output: Controlling LEDs and Relays with ESP8266
💡 What You'll Learn:
- 🔌 Control LEDs and relays with ESP8266
- 💧 Automate water pumps based on soil moisture
- ⚡ Understand active LOW vs active HIGH relays
🔧 Basic LED Control
#define LED_PIN 4  // D2 on NodeMCU

void setup() {
    pinMode(LED_PIN, OUTPUT);
    Serial.begin(115200);
}

void loop() {
    digitalWrite(LED_PIN, HIGH);  // LED ON
    Serial.println("🔴 LED ON");
    delay(1000);

    digitalWrite(LED_PIN, LOW);   // LED OFF
    Serial.println("⚫ LED OFF");
    delay(1000);
}
💧 Relay Control for Water Pump
#define RELAY_PIN 5  // D1 on NodeMCU

void setup() {
    pinMode(RELAY_PIN, OUTPUT);
    digitalWrite(RELAY_PIN, HIGH);  // Start with pump OFF
    Serial.begin(115200);
}

void waterPump(int seconds) {
    digitalWrite(RELAY_PIN, LOW);   // Turn pump ON (active LOW)
    Serial.printf("💧 Water pump ON for %d seconds\n", seconds);
    delay(seconds * 1000);
    digitalWrite(RELAY_PIN, HIGH);  // Turn pump OFF
    Serial.println("💧 Water pump OFF");
}

void loop() {
    // Replace with actual soil moisture sensor reading
    int soilMoisture = 25;  // 0-100%

    if (soilMoisture < 30) {
        Serial.println("⚠️ Soil dry - Starting irrigation");
        waterPump(10);  // Water for 10 seconds
    } else {
        Serial.println("✅ Soil moisture adequate");
    }

    delay(60000);  // Check every minute
}
💡 Important Notes:
- Most relay modules are active LOW →
LOW= ON,HIGH= OFF - Always test your relay to confirm which state turns it on
- Use a resistor (220Ω) with LEDs to prevent damage
- Never connect pump directly to ESP8266 - always use a relay
⚠️ Common Issues:
- Relay clicks but pump doesn't run: Check COM and NO connections (not NC)
- ESP8266 resets when relay activates: Use external 5V power for relay
- LED doesn't light: Check polarity (long leg to positive)
🎉 Quick Reference:
pinMode(pin, OUTPUT)→ Set pin as outputdigitalWrite(pin, HIGH)→ Set pin HIGH (3.3V)digitalWrite(pin, LOW)→ Set pin LOW (0V)delay(ms)→ Wait for milliseconds
💡 Key Takeaways:
- Apply these concepts directly to your farm or project.
- Take notes on important details for the quiz.
- Use the button below to track your progress.
×
![Enlarged view]()